
In the article we’re going to cover the basics of Elasticsearch: what it is, how to run it, how to communicate with it.
Then, after we feel comfortable with Elasticsearch, we will start developing a simple web application with Django that will use the power of Elasticsearch.
Running Elasticsearch
Before diving into the concepts of Elasticsearch we should run it first.
When you start reading about Elasticsearch on the internet, you will definitely stumble upon Elastic Stack term. Elastic Stack is an ecosystem of different tools: Kibana, Logstash, Beats and Elasticsearch itself. In the article we’re going to use only Elasticsearch.
The simplest way to run Elasticsearch is to use Docker. All you need is to pull an image from DockerHub, run the container and it just works:
$ docker pull elasticsearch:6.6.1
$ docker run -d --name elasticsearch -p 9200:9200 -e "discovery.type=single-node" elasticsearch:6.6.1
If you did everything correctly you should be able to send HTTP request to Elasticsearch:
$ http GET localhost:9200
HTTP/1.1 200 OK
content-encoding: gzip
content-length: 298
content-type: application/json; charset=UTF-8

{
    "cluster_name": "docker-cluster",
    "cluster_uuid": "9aZz9ThdRUSvhgWJn5GaOQ",
    "name": "DsBD6kQ",
    "tagline": "You Know, for Search",
    "version": {
        "build_date": "2019-02-13T17:10:04.160291Z",
        "build_flavor": "default",
        "build_hash": "1fd8f69",
        "build_snapshot": false,
        "build_type": "tar",
        "lucene_version": "7.6.0",
        "minimum_index_compatibility_version": "5.0.0",
        "minimum_wire_compatibility_version": "5.6.0",
        "number": "6.6.1"
    }
}
I’ve used here and will be using later httpie library for sending HTTP requests. You can use httpie, curl or any other client for sending requests. It’s up to you.
Elasticsearch Essentials
Elasticsearch is a search engine. Some of the reasons why you should consider using Elasticsearch for searching data in favor of regular SQL databases like PostgreSQL or MySQL:
- it works really fast;
- it scales;
- it has a lot of cool components like Kibana for visualizing data, Logstash for collecting and transforming data and etc.
Communication with Elasticsearch happens through RESTful API. Because of that, all operations are available over HTTP. If you’ve already used RESTful APIs before, the communication should be smooth for you.
Elasticsearch is NoSQL database. It stores data as JSON documents and it doesn’t impose a strict structure on your data which means that you can put anything you want in your JSON document.
These JSON documents are organized within types and indexes. Each document belongs to a type. The type itself lives in the index. Each index can contain only a single type.
We can draw a parallel between how Elasticsearch stores data and how any relational database stores data:
Relational DB → Databases → Tables → Rows → Columns
Elasticsearch → Indexes → Types → Documents → Fields
The only difference is that in relational databases each database can have many tables. But in Elasticsearch each index can only have one type.
In previous Elasticsearch versions though, an index could have more than one type, but right now it’s deprecated. If you want to learn why is that, you can read about it here.
Elasticsearch Requests
Time to get our hands dirty and make our first request to Elasticsearch:
PUT /tweets/doc/1
{
  "author": "Elon Musk",
  "text": "This might be my finest work",
  "likes": 43000
}

{
  "_index" : "tweets",
  "_type" : "doc",
  "_id" : "1",
  "_version" : 1,
  "result" : "created",
  "_shards" : {
    "total" : 2,
    "successful" : 1,
    "failed" : 0
  },
  "_seq_no" : 0,
  "_primary_term" : 1
}
In this one request we actually did a lot of things:
- Created an index
tweets - Created a type
doc - Indexed a new document which contains information about a tweet
Now let’s index a couple of other documents:
PUT /tweets/doc/2
{
  "author": "Elon Musk",
  "text": "Thank you!",
  "likes": 42000
}

PUT /tweets/doc/3
{
  "author": "Neil deGrasse Tyson",
  "text": "The rise of flat-Earthers in the United States is evidence of two things: 1) the protection of speech, and 2) the failure of our educational system.",
  "likes": 110000
}

PUT /tweets/doc/4
{
  "author": "Elon Musk",
  "text": "@apirobotme your blog is the best blog about web development I have ever read. Thank you!",
  "likes": 1000000
}
In order to retrieve an individual document, we can make a GET request and specify an address of this document. Its index, type and id:
GET /tweets/doc/2
{
  "_index" : "tweets",
  "_type" : "doc",
  "_id" : "2",
  "_version" : 1,
  "_seq_no" : 0,
  "_primary_term" : 1,
  "found" : true,
  "_source" : {
    "author" : "Elon Musk",
    "text" : "Thank you!",
    "likes" : 42000
  }
}
Simple search for all documents looks like this:
GET /tweets/doc/_search

{
  "took" : 19,
  "timed_out" : false,
  "_shards" : {
    "total" : 5,
    "successful" : 5,
    "skipped" : 0,
    "failed" : 0
  },
  "hits" : {
    "total" : 4,
    "max_score" : 1.0,
    "hits" : [
      {
        "_index" : "tweets",
        "_type" : "doc",
        "_id" : "2",
        "_score" : 1.0,
        "_source" : {
          "author" : "Elon Musk",
          "text" : "Thank you!",
          "likes" : 42000
        }
      },
      {
        "_index" : "tweets",
        "_type" : "doc",
        "_id" : "4",
        "_score" : 1.0,
        "_source" : {
          "author" : "Elon Musk",
          "text" : "@apirobotme your blog is the best blog about web development I have ever read. Thank you!",
          "likes" : 1000000
        }
      },
      {
        "_index" : "tweets",
        "_type" : "doc",
        "_id" : "1",
        "_score" : 1.0,
        "_source" : {
          "author" : "Elon Musk",
          "text" : "This might be my finest work",
          "likes" : 43000
        }
      },
      {
        "_index" : "tweets",
        "_type" : "doc",
        "_id" : "3",
        "_score" : 1.0,
        "_source" : {
          "author" : "Neil deGrasse Tyson",
          "text" : "The rise of flat-Earthers in the United States is evidence of two things: 1) the protection of speech, and 2) the failure of our educational system.",
          "likes" : 110000
        }
      }
    ]
  }
}
But the “search” we did right now is not useful because it just returned a list of all documents. Let’s make a real search and try to find documents with specific author:
GET /tweets/doc/_search
{
  "query": {
    "match": {
      "author": "elon"
    }
  }
}

{
  "took" : 5,
  "timed_out" : false,
  "_shards" : {
    "total" : 5,
    "successful" : 5,
    "skipped" : 0,
    "failed" : 0
  },
  "hits" : {
    "total" : 3,
    "max_score" : 0.2876821,
    "hits" : [
      {
        "_index" : "tweets",
        "_type" : "doc",
        "_id" : "1",
        "_score" : 0.2876821,
        "_source" : {
          "author" : "Elon Musk",
          "text" : "This might be my finest work",
          "likes" : 43000
        }
      },
      {
        "_index" : "tweets",
        "_type" : "doc",
        "_id" : "2",
        "_score" : 0.18232156,
        "_source" : {
          "author" : "Elon Musk",
          "text" : "Thank you!",
          "likes" : 42000
        }
      },
      {
        "_index" : "tweets",
        "_type" : "doc",
        "_id" : "4",
        "_score" : 0.18232156,
        "_source" : {
          "author" : "Elon Musk",
          "text" : "@apirobotme your blog is the best blog about web development I have ever read. Thank you!",
          "likes" : 1000000
        }
      }
    ]
  }
}
We can go further and make it more complicated. For example, let’s do a full-text search on text field and also filter tweets based on the number of likes they have:
GET /tweets/doc/_search
{
  "query" : {
    "bool": {
      "must": {
        "match": {
          "text" : "thank"
        }
      },
      "filter": {
        "range" : {
          "likes" : { "gt" : 50000 }
        }
      }
    }
  }
}

{
  "took" : 90,
  "timed_out" : false,
  "_shards" : {
    "total" : 5,
    "successful" : 5,
    "skipped" : 0,
    "failed" : 0
  },
  "hits" : {
    "total" : 1,
    "max_score" : 0.1383129,
    "hits" : [
      {
        "_index" : "tweets",
        "_type" : "doc",
        "_id" : "4",
        "_score" : 0.1383129,
        "_source" : {
          "author" : "Elon Musk",
          "text" : "@apirobotme your blog is the best blog about web development I have ever read. Thank you!",
          "likes" : 1000000
        }
      }
    ]
  }
}
Or instead of filtering tweets by likes we can sort them and show the most liked tweets first:
GET /tweets/doc/_search
{
  "query": {
    "function_score": {
      "query": {
        "match": {
          "text" : "thank"
        }
      },
      "field_value_factor": {
        "field": "likes"
      }
    }
  }
}

{
  "took" : 36,
  "timed_out" : false,
  "_shards" : {
    "total" : 5,
    "successful" : 5,
    "skipped" : 0,
    "failed" : 0
  },
  "hits" : {
    "total" : 2,
    "max_score" : 138312.9,
    "hits" : [
      {
        "_index" : "tweets",
        "_type" : "doc",
        "_id" : "4",
        "_score" : 138312.9,
        "_source" : {
          "author" : "Elon Musk",
          "text" : "@apirobotme your blog is the best blog about web development I have ever read. Thank you!",
          "likes" : 1000000
        }
      },
      {
        "_index" : "tweets",
        "_type" : "doc",
        "_id" : "2",
        "_score" : 11231.009,
        "_source" : {
          "author" : "Elon Musk",
          "text" : "Thank you!",
          "likes" : 42000
        }
      }
    ]
  }
}
Django and Elasticsearch in Action
Now when you have an idea of what Elasticsearch is and how to work with it, let’s create a simple web application with Django which will use the power of Elasticsearch.
We will try to create a web application that will help us to search for awesome TED talks. The end result looks like this:
First, we will download raw data on TED talks like their names, descriptions, transcripts and etc. Then we will insert this data into relational database and index some parts of the data from relational database into Elasticsearch. After that, we will create a page which will interact with Elasticsearch and show the most relevant and popular talks based on the search query that the user will type on this page.
You can find the source code of this application here.
Setting up the project
Our project will use PostgreSQL as a relational database, Elasticsearch and Django. The simplest way to set up everything is to use Docker. We have already used Docker previously when we run Elasticsearch in a container. But now we will have 3 containers. One for PostgreSQL, one for Elasticsearch and one for Django web application.
Let’s start from creating an empty project:
django-admin startproject ted
Adding requirements.txt file:
# requirements.txt
Django==2.2
psycopg2==2.8.1
django-elasticsearch-dsl==0.5.1
djangorestframework==3.9.2
pyexcel==0.5.13
pyexcel-io==0.5.17
And updating project’s settings file:
# ted/settings.py

...

INSTALLED_APPS = [
    ...
    'django_elasticsearch_dsl',
    'rest_framework',
]

...

DATABASES = {
    'default': {
        'ENGINE': 'django.db.backends.postgresql_psycopg2',
        'NAME': os.environ.get('POSTGRES_DB'),
        'USER': os.environ.get('POSTGRES_USER'),
        'PASSWORD': os.environ.get('POSTGRES_PASSWORD'),
        'HOST': os.environ.get('POSTGRES_HOST'),
        'PORT': os.environ.get('POSTGRES_PORT'),
    }
}

...

# Elasticsearch

ELASTICSEARCH_DSL = {
    'default': {
        'hosts': 'elasticsearch:9200'
    },
}

# Django REST Framework

REST_FRAMEWORK = {
    'DEFAULT_PAGINATION_CLASS': 'rest_framework.pagination.PageNumberPagination',
    'PAGE_SIZE': 10,
}
Now we’re ready to configure Docker.
Let’s create a Dockerfile for our web application:
# docker/web/Dockerfile
FROM python:3.7-alpine

ENV PYTHONUNBUFFERED 1

RUN apk update \\
  # psycopg2 dependencies
  && apk add --virtual build-deps gcc python3-dev musl-dev \\
  && apk add postgresql-dev \\
  && apk add postgresql-client

COPY ./requirements.txt /requirements.txt
RUN pip install -r /requirements.txt

COPY ./docker/web/start /start
RUN sed -i 's/\\r//' /start
RUN chmod +x /start

WORKDIR /app
And add start bash script which we will always execute after starting a container with web application:
# docker/web/start
#!/bin/sh

set -o errexit
set -o pipefail
set -o nounset

python /app/manage.py migrate
python /app/manage.py runserver 0.0.0.0:8000
Like I said earlier we will have 3 containers and these containers should be able to communicate. For example, our web application should be able to send queries to PostgreSQL and Elasticsearch containers. The best tool for running multi-container Docker applications is Docker Compose. With Docker Compose we use YAML file to configure our application’s services. It looks like this:
# docker-compose.yml
version: '3'

volumes:
  pgdata: {}
  esdata: {}

services:
  web:
    build:
      context: .
      dockerfile: ./docker/web/Dockerfile
    image: ted_web
    volumes:
      - .:/app
    depends_on:
      - postgres
      - elasticsearch
    env_file: .env
    ports:
      - "8000:8000"
    command: /start

  postgres:
    image: postgres:10.5
    env_file: .env
    volumes:
      - pgdata:/var/lib/postgresql/data

  elasticsearch:
    image: elasticsearch:6.6.1
    volumes:
      - esdata:/usr/share/elasticsearch/data
    environment:
      - discovery.type=single-node
    ports:
      - "9200:9200"
Before running Docker Compose we should create .env file. In this file we will store some important environment variables:
# .env
POSTGRES_HOST=postgres
POSTGRES_PORT=5432
POSTGRES_DB=ted
POSTGRES_USER=pgadmin
POSTGRES_PASSWORD=maestro
Now we’re good to go:
$ docker-compose up
When the containers are ready, you should be able to open the main page:
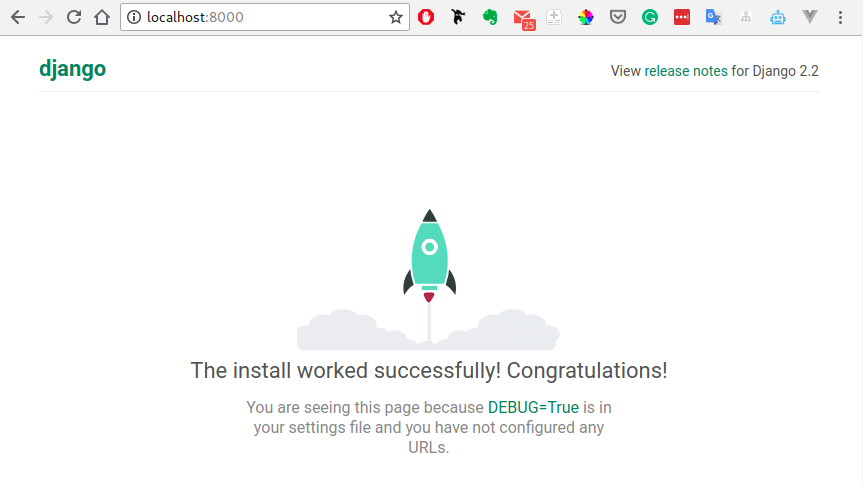
The last step for setting up the project is to create a django app:
$ django-admin startapp talks
And add it to the list of installed apps:
# ted/settings.py

...

INSTALLED_APPS = [
    ...
    'talks',
]
Inserting data into relational database
Let’s create a model:
# talks/models.py
from django.db import models


class Talk(models.Model):
    name = models.CharField(max_length=200)
    description = models.TextField()
    speaker = models.CharField(max_length=200)
    url = models.URLField()
    number_of_views = models.PositiveIntegerField()
    transcript = models.TextField()

    def __str__(self):
        return self.name
And run migrations:
$ docker-compose run --rm web python manage.py makemigrations
$ docker-compose run --rm web python manage.py migrate
Now when we have a table in the database and a model which operates on this table, we should fill the database with information about TED talks.
I will download csv files filled with data from kaggle and process these files using pyexcel library. If you’re going along, make sure that you copied ted_main.csv and transcripts.csv files into your project’s root directory.
The script which processes files:
# talks/models.py
from pyexcel import get_sheet
from django.db import models


class Talk(models.Model):
    ...

    @classmethod
    def populate(cls):
        cls.objects.all().delete()

        url_to_talk_data = {}

        ted_sheet = get_sheet(
            file_name='ted_main.csv',
            name_columns_by_row=0
        )
        for name, description, speaker, url, number_of_views in zip(
            ted_sheet.column['name'],
            ted_sheet.column['description'],
            ted_sheet.column['main_speaker'],
            ted_sheet.column['url'],
            ted_sheet.column['views'],
        ):
            url = url.strip()
            url_to_talk_data[url] = {
                'name': name,
                'description': description,
                'speaker': speaker,
                'url': url,
                'number_of_views': number_of_views,
                'transcript': '',
            }

        transcripts_sheet = get_sheet(
            file_name='transcripts.csv',
            name_columns_by_row=0
        )
        for transcript, url in zip(
            transcripts_sheet.column['transcript'],
            transcripts_sheet.column['url'],
        ):
            url = url.strip()
            if url in url_to_talk_data:
                url_to_talk_data[url].update({
                    'transcript': transcript,
                })

        cls.objects.bulk_create([
            cls(
                name=talk_data['name'],
                description=talk_data['description'],
                speaker=talk_data['speaker'],
                url=talk_data['url'],
                number_of_views=talk_data['number_of_views'],
                transcript=talk_data['transcript'],
            )
            for talk_data in url_to_talk_data.values()
        ])
Open a shell and run populate method that we’ve just written:
$ docker-compose run --rm web python manage.py shell
>>> from talks.models import Talk
>>> Talk.populate()
If the script worked without any errors, your database should be filled with data.
Indexing data into Elasticsearch
Now let’s define an Elasticsearch index and TalkDocument class:
# talks/documents.py
from django_elasticsearch_dsl import DocType, Index
from .models import Talk

talks = Index('talks')
talks.settings(number_of_shards=1, number_of_replicas=0)


@talks.doc_type
class TalkDocument(DocType):
    class Meta:
        # The model associated with Elasticsearch document
        model = Talk

        # The fields of the model you want to be indexed
        # in Elasticsearch
        fields = (
            'name',
            'description',
            'speaker',
            'number_of_views',
            'transcript',
        )
This class basically connects our relational database with Elasticsearch. In order to create an index talks and index data from the relational database into Elasticsearch, we should run the management command that comes from the library django_elasticsearch_dsl:
$ docker-compose run --rm web python manage.py search_index --rebuild
If you try to make a request to Elasticsearch now, you will see the same data we had in our relational database except for url field because we haven’t indexed it:
GET /talks/doc/_search
{
	"took": 8,
	"timed_out": false,
	"_shards": {
		"total": 1,
		"successful": 1,
		"skipped": 0,
		"failed": 0
	},
	"hits": {
		"total": 2550,
		"max_score": 1.0,
		"hits": [
			{
				"_index": "talks",
				"_type": "doc",
				"_id": "1",
				"_score": 1.0,
				"_source": {
					"name": "Ken Robinson: Do schools kill creativity?",
					"description": "Sir Ken Robinson makes an entertaining and profoundly moving case for creating an education system that nurtures (rather than undermines) creativity.",
					"speaker": "Ken Robinson",
					"number_of_views": 47227110,
					"transcript": "Good morning. How are you?(Laughter)It's been great, hasn't it? I've been blowreakespeare having a father, do you? Do you? Because you don't think of Shakespeare beirow up, we start to ..."
				}
			},
			...
			{
				"_index": "talks",
				"_type": "doc",
				"_id": "10",
				"_score": 1.0,
				"_source": {
					"name": "Rick Warren: A life of purpose",
					"description": "Pastor Rick Warren, author of \\"The Purpose-Driven Life,\\" reflects on his own crisis of purpose in the wake of his book's wild success. He explains his belief that God's intention is for each of us to use our talents and influence to do good.",
					"speaker": "Rick Warren",
					"number_of_views": 3095993,
					"transcript": "I'm often asked, \\"What surprised you about the book?\\" And I say, \\"That I got to ..."
				}
			}
		]
	}
}
Searching for talks
Let’s create a function that searches for relevant talks. It will analyze name, description, speaker and transcript fields and also boost talks that have the highest number of views:
# talks/search.py
from elasticsearch_dsl.query import Q, MultiMatch, SF
from .documents import TalkDocument


def get_search_query(phrase):
    query = Q(
        'function_score',
        query=MultiMatch(
            fields=['name', 'description', 'speaker', 'transcript'],
            query=phrase
        ),
        functions=[
            SF('field_value_factor', field='number_of_views')
        ]
    )
    return TalkDocument.search().query(query)


def search(phrase):
    return get_search_query(phrase).to_queryset()
You can play around with this function from the shell:
$ docker-compose run --rm web python manage.py shell
>>> from talks.search import search
>>> talks = search('elon musk')
>>> talks
<QuerySet [<Talk: Elon Musk: The future we're building -- and boring>, <Talk: Elon Musk: The mind behind Tesla, SpaceX, SolarCity ...>, <Talk: Adam Grant: The surprising habits of original thinkers>, <Talk: Stephen Petranek: Your kids might live on Mars. Here's how they'll survive>, <Talk: Larry Page: Where’s Google going next?>, <Talk: Grady Booch: Don't fear superintelligent AI>, <Talk: Jim Simons: The mathematician who cracked Wall Street>, <Talk: Naomi Oreskes: Why we should trust scientists>, <Talk: Stuart Russell: 3 principles for creating safer AI>, <Talk: Burt Rutan: The real future of space exploration>]>
Creating REST API endpoint
Now let’s create a simple API using Django REST Framework. We will start using it later when we start creating a web page.
First define a serializer:
# talks/api/serializers.py
from rest_framework import serializers
from ..models import Talk


class TalkSerializer(serializers.ModelSerializer):
    class Meta:
        model = Talk
        fields = (
            'name',
            'description',
            'speaker',
            'url',
            'number_of_views',
            'transcript',
        )
Create a view:
# talks/api/views.py
from rest_framework import generics
from ..models import Talk
from ..search import search
from .serializers import TalkSerializer


class TalkList(generics.ListAPIView):
    queryset = Talk.objects.all()
    serializer_class = TalkSerializer

    def get_queryset(self):
        q = self.request.query_params.get('q')
        if q is not None:
            return search(q)
        return super().get_queryset()
Also don’t forget to add a new url to the list of urlpatterns:
# ted/urls.py
...
from talks.api.views import TalkList

urlpatterns = [
    ...
    path('api/v1/talks/', TalkList.as_view()),
]
Creating a page
And the last step is to create a page. I will use Vue.js in order to dynamically refresh a list of talks without refreshing the page. But you can use whatever you want. Even write everything in pure Javascript. I picked Vue.js because it’s simple and very easy to use.
Let’s add a view:
# talks/views.py
from django.shortcuts import render


def talk_list(request):
    return render(request, 'talks/talk_list.html')
Create a template:
<!-- talks/templates/talks.talk_list.html -->
<!DOCTYPE html>
<html lang="en">
<head>
    <meta charset="UTF-8">
    <title>Talk List</title>
    <link rel="stylesheet" href="<https://cdn.jsdelivr.net/npm/semantic-ui@2.4.2/dist/semantic.min.css>">
</head>
<body>
    <div id="app">
        <div class="ui placeholder segment">
            <div class="ui input focus">
                <input
                    v-model="query"
                    type="text"
                    placeholder="Search for talks..."
                />
            </div>
        </div>
        <div class="ui three column stackable grid container">
            <div v-for="talk in talks" class="column">
                <a class="ui card" :href="talk.url">
                    <div class="content">
                        <div class="header">[[ talk.name ]]</div>
                        <div class="meta">[[ talk.speaker ]]</div>
                        <div class="description">[[ talk.description ]]</div>
                    </div>
                    <div class="extra content">
                        <i class="check icon"></i>
                        [[ talk.number_of_views ]] Views
                    </div>
                </a>
            </div>
        </div>
    </div>
    <script src="<https://unpkg.com/vue>"></script>
    <script src="<https://unpkg.com/lodash>"></script>
    <script src="<https://unpkg.com/axios/dist/axios.min.js>"></script>
    <script src="<https://cdn.jsdelivr.net/npm/semantic-ui@2.4.2/dist/semantic.min.js>"></script>
    <script>
        new Vue({
            el: '#app',
            delimiters: ['[[', ']]'],
            data: {
                query: '',
                talks: []
            },
            // This hook will be executed when the instance of
            // Vue is created
            async created () {
                this.talks = await this.getTalks()
            },
            methods: {
                // Sends a request to our API in order to get
                // a list of talks
                async getTalks () {
                    const response = await axios.get('/api/v1/talks/', {
                        params: {
                            q: this.query
                        }
                    })
                    return response.data.results
                }
            },
            watch: {
                // This function will be executed every time
                // the user changes `query`.
                // Using debounce from lodash library here allows us to
                // delay sending a request to an API until
                // the user has stopped changing `query`.
                // Stopped typing, basically.
                query: _.debounce(async function () {
                    this.talks = await this.getTalks()
                }, 500)
            }
        })
    </script>
</body>
</html>
And update urlpatterns:
# ted/urls.py
...
from talks.views import talk_list

urlpatterns = [
    ...
    path('talks/', talk_list),
]
Conclusion
In the article, we’ve covered Elasticsearch from a high level, but it has a lot of features that are beyond the scope of this single article.
For further learning, you can read documentation, or even better, try to build something yourself. Have fun!
Another alternative to do this is to use ZomboDB. It is a plugin for Postgres that uses elasticsearch as an index for tables. It makes the search faster but the same time you can still use Django ORM. There’s an open source package that helps you manage ZomboDB on Django, django-zombodb (https://github.com/vintasoftware/django-zombodb).
Haven’t heard about zombodb, thanks. Will check this out.
I am unclear what you mean about making a PUT request to elastic search? what tool are you using there?
In this article I made requests in terminal using httpie (https://httpie.org/). But you can use insomnia (https://insomnia.rest/). It simpler to use because it has UI.
http PUT localhost:9200/tweets/doc/1 data=@data.txt
and data.txt is a file with:
{
“author”: “Elon Musk”,
“text”: “This might be my finest work”,
“likes”: 43000
}
How to set size manually? It returns only 10 objects.
It’s because of the pagination. You can read about it here https://www.elastic.co/guide/en/elasticsearch/reference/current/search-request-body.html#request-body-search-from-size
Great post!…question: When data is added to postgrep, is it immediately available in elasticseach? or any idea how to do this…thanks
If you use Django Elasticsearch DSL library, then the data will be automatically synchronized with Elasticsearch through Django signals.
If you don’t use this library, what you could do is you could create a celery task that will synchronize data. This celery task could be a background task that will be executed let’s say every hour. Or you could execute this task in Django signals.
Thanks for posting this tutorial, I’ve previously used python, elasticsearch and kibana to search through this Ted Talk dataset and now looking forward to using django. I’m not using docker, I am just using pycharm’s django and installing all the reqs.
I’m getting an error with this command:
python manage.py search_index –rebuild
Error message:
…..
elasticsearch.exceptions.ConnectionError: ConnectionError(: Failed to establish a new connection: [Errno 8] nodename nor servname provided, or not known) caused by: NewConnectionError(: Failed to establish a new connection: [Errno 8] nodename nor servname provided, or not known)
My elasticsearch server is running. I’ve tried to trouble shoot this on my own for some time and leaving a comment as a last resort before I give up on elasticsearch and django.
Here are the relevant specs:
Django 2.2
django-elasticsearch-dsl 0.5.1
djangorestframework 3.9.2
elasticsearch 6.4.0
elasticsearch-dsl 6.1.0
pyexcel 0.5.13
pyexcel-io 0.5.17
urllib3 1.25.3
any input would be appreciated, thanks!
How would you dispaly the TED thumbnails as well ?